The Physics of Cool: What is the Refrigeration Cycle?
If you ask a homeowner how their air conditioner works, they might say, “It blows cold air.” But as a technician, you know that is technically incorrect.
Cold does not exist. “Cold” is simply the absence of heat.
To cool a house (or a refrigerator), you aren’t “making cold”; you are moving heat from a place where it isn’t wanted (inside) to a place where it doesn’t matter (outside).
This process is called the Refrigeration Cycle. Understanding refrigeration how does it work is the single most important concept in the HVAC trade. It is the foundation of the <a href=”https://hvacexammaster.com/epa-608.html”>EPA 608 exam</a>, the core of the NATE certification, and the logic behind every repair you will ever perform.
If you memorize the components but don’t understand the physics of heat transfer, you will never be more than a “parts changer.” In this guide, we will break down the thermodynamics behind the system so you can troubleshoot like a pro.
📊 Do You Know Your Physics?
Scenario: If the metering device gets clogged, what happens to Superheat? Test your diagnostics logic now.
The Core Concept: Latent Heat vs. Sensible Heat
Before we look at the parts, we need to talk about the physics. The magic of refrigeration happens when the refrigerant changes state (from liquid to gas, or gas to liquid).
- Sensible Heat: Heat you can feel and measure with a thermometer. When water heats up from 70°F to 211°F, that is sensible heat.
- Latent Heat (The Secret Weapon): Heat that causes a change of state without changing temperature. When 212°F water turns into 212°F steam, it absorbs a massive amount of energy.
Refrigeration how does it work? It works by manipulating pressures to force the refrigerant to boil (absorb heat) and condense (reject heat) at specific temperatures.
The 4 Main Components of the Cycle
Every mechanical refrigeration system, from a small window unit to a massive supermarket rack system, relies on four key components.
1. The Compressor (The Heart)
The compressor is the pump that moves the refrigerant.
- State: Low Pressure Gas -> High Pressure Gas.
- Function: It squeezes the “cool” gas coming from the house, packing the molecules tight until they become incredibly hot (hotter than the outside air).
- Exam Tip: Compressors can only pump gas. If liquid enters the compressor (floodback), it will destroy the valves.
2. The Condenser (The Heat Rejecter)
This is the outdoor unit. Its job is to get rid of the heat the refrigerant picked up inside the house.
- State: High Pressure Gas -> High Pressure Liquid.
- Function: As the hot gas flows through the coils, the outdoor fan blows air over it. Since heat moves to cold, the heat leaves the refrigerant and goes into the outside air. The refrigerant condenses back into a liquid.
- Key Metric: Subcooling is measured here. It tells us how much liquid is stacking up at the bottom of the condenser.
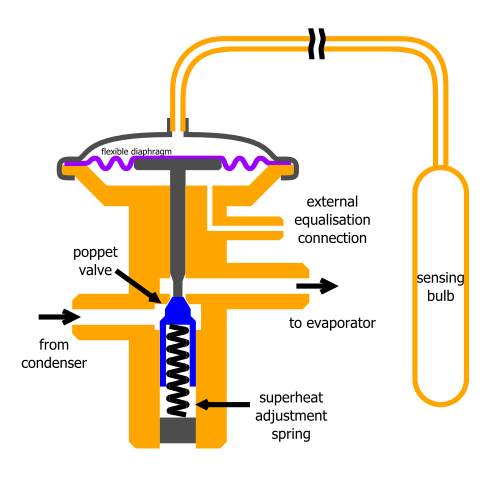
3. The Metering Device (The Bottleneck)
This divides the High Side from the Low Side. It can be a simple piston or a complex TXV (Thermostatic Expansion Valve).
- State: High Pressure Liquid -> Low Pressure Spray (Flash Gas).
- Function: It restricts the flow, causing a massive pressure drop. Just like hairspray feels cold when it leaves the can, the refrigerant instantly drops in temperature as it expands.
4. The Evaporator (The Heat Absorber)
This is the indoor coil (usually above the furnace).
- State: Low Pressure Liquid -> Low Pressure Gas.
- Function: The “starving” cold liquid travels through the coil. Warm air from the house blows over it. The refrigerant boils (evaporates) instantly, absorbing the heat from the air like a sponge.
- Key Metric: Superheat is measured here. It proves that all liquid has boiled off before returning to the compressor.
Step-by-Step: Refrigeration How Does It Work?
Let’s trace the path of a refrigerant molecule (let’s call him “R-410A”) through the system.
- Suction Line: R-410A enters the compressor as a cool, low-pressure gas.
- Compression: The compressor squeezes him. He gets angry and hot (High Pressure, High Temp Gas).
- Discharge Line: He travels to the Condenser.
- Condensation: The outdoor fan blows air over him. He cools down and turns into a liquid (High Pressure Liquid).
- Liquid Line: He travels to the Metering Device.
- Expansion: He is forced through a tiny hole. His pressure crashes, and he turns into a freezing cold mist (Flash Gas).
- Evaporation: He enters the Evaporator Coil. The warm air from your living room hits the coil. R-410A absorbs that heat, boils completely into a gas, and heads back to the compressor to start over.
🛠️ Identify the State Change
Exam Question: In which component does the refrigerant change from a high-pressure vapor to a high-pressure liquid?
Why “Superheat” and “Subcooling” Matter
When you are searching for “refrigeration how does it work,” you are really looking for the answer to troubleshooting. You can’t see inside the copper pipes, so how do you know what the refrigerant is doing?
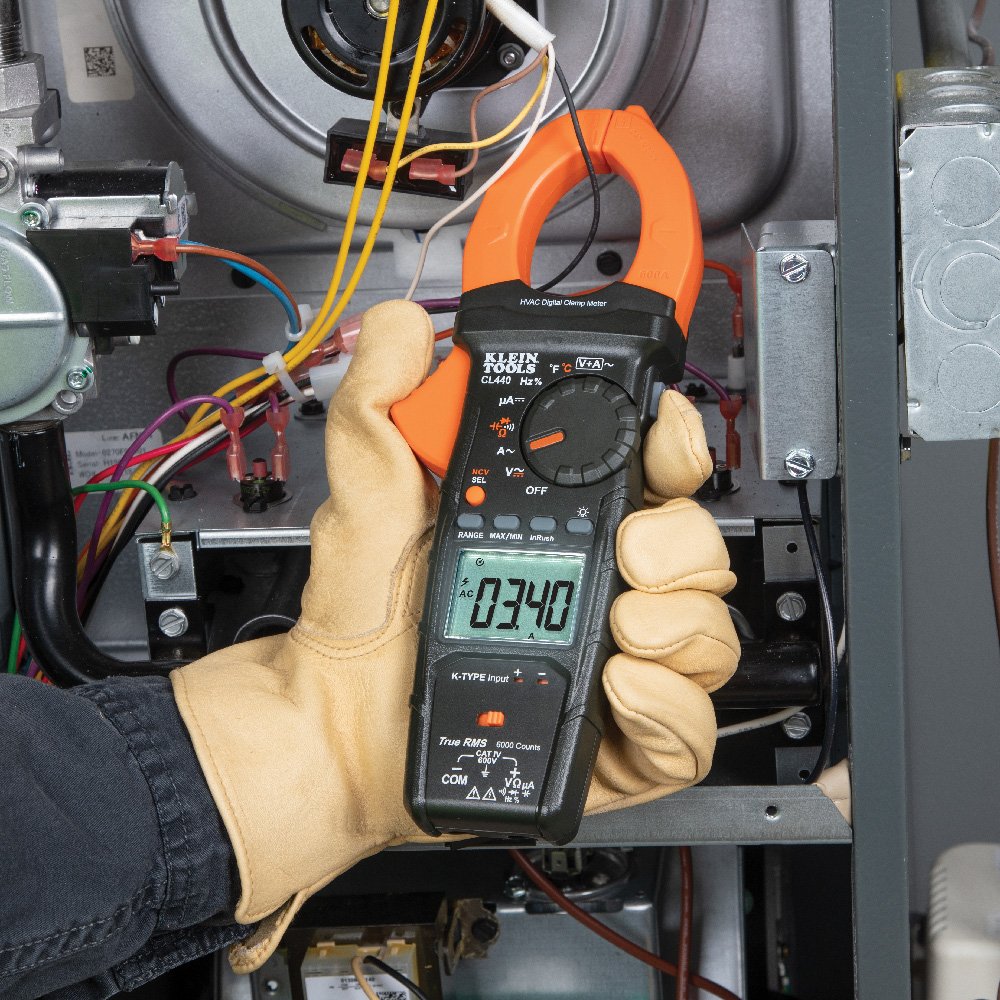
You use your <a href=”https://hvacexammaster.com/essential-hvac-tools-list/”>HVAC tools</a> (Manifold Gauges and Thermometers) to measure two things:
Superheat (The Compressor Protector)
- Definition: How much temperature the gas gained after it finished turning into a vapor.
- Why it matters: If Superheat is 0, it means there is still liquid in the line. Liquid kills compressors. You need positive Superheat to ensure the compressor is safe.
Subcooling (The Efficiency Check)
- Definition: How much temperature the liquid lost after it finished turning into a liquid.
- Why it matters: You need a solid column of liquid entering the metering device. If Subcooling is 0, you have bubbles (flash gas) in the line, and the system won’t cool.
Common Troubleshooting Scenarios
Here is how applying the “Refrigeration Cycle” theory helps you fix broken units (and pass the NATE exam).
Scenario 1: Low Suction Pressure + Low Head Pressure
- Diagnosis: Low Charge (Leak).
- Why: There isn’t enough refrigerant to build pressure on either side.
Scenario 2: Low Suction Pressure + High Superheat
- Diagnosis: Restriction (Bad TXV or Clogged Filter Drier).
- Why: The compressor is sucking hard (Low Pressure), but the refrigerant is blocked from entering the coil, so the little bit that gets through boils instantly and gets very hot (High Superheat).
Conclusion
Understanding refrigeration how does it work is the difference between a “parts swapper” and a true technician. Anyone can change a capacitor, but only a pro understands why a dirty condenser coil causes high amp draw on the compressor.
Whether you are working on a residential split system or a commercial walk-in freezer, the physics never change. Master the cycle, and you will master the trade. For more advanced troubleshooting scenarios, check out our NATE Certification Prep Guide.
Ready to master the theory?
Don’t rely on guesswork. Use our visual study tools and scenario-based questions to solidify your understanding of the refrigeration cycle before your next exam.
📱 Turn Downtime Into Study Time
Access 1,000+ technical questions on Superheat, Subcooling, and the Refrigeration Cycle. No downloads required.

0 Comments